“Time-Saving” Food

After blogging about time-saving “food” here’s my take on the flip side – “time-saving” food.

Last year I broke down and joined the legions of cooks and moms who own and use a slow cooker. Since then I’ve discovered a new pet peeve. I hate to see recipes for slow cookers that label themselves, “time-savers,” but in reality are far from.

Time-saving recipes need to save time. Just because food is cooked in a slow cooker and could be ready when I get home doesn’t mean it saved time. If I had to get up at 3:00 in the morning to prep the food then I will probably be too tired to eat it when I get home. Zero time saved. Or if a recipe calls for only 4 or 5 hours of cook time, then it is not a weekday recipe that will save time. I’m not going home on my lunch hour to make dinner!

I want recipes like this:
1.) put raw food in Crock Pot
2.) cook on low for 9-10 hours
3.) enjoy!

But there are recipes aplenty that require lots of prep like chopping, layering, and cooking the food before it goes into the pot. Why would I want to pre-cook anything before I put it in a COOKER? Except maybe double-cooked pork, but that’s … Oh you know what I mean.

I get that browning adds flavor, but I wonder how much of that flavor really holds up when food is cooked in a slow cooker all day. I’ll try a comparison some time. Even if it does enhance the taste, is it worth it on a regular basis?

To save time you can start with food that’s already totally cooked like rotisserie chicken. If you shop around you can find rotisserie chicken that don’t cost much more than buying a raw chicken. These can be a huge time-saver! But you can’t feed your family only rotisserie chickens, and you’ll want to watch salt and other flavorings that might be added to store-bought rotisserie chicken. For that matter, you can slow cook your own chicken in a crock pot. Save the bones from either, put them in a slow cooker all day, strain and you’ll have a great (not too hard) chicken stock. This is one if the times home-cooked makes a big difference in taste. Freeze or refrigerate and you can use it to make lots of easy soups.

There are time-saving ways to cook food out there! But not all slow-cooker recipes are created equal.

When Taste of Home shared this recipe for Slow Cooker Enchiladas on Facebook it was the perfect example of a not-so-time-saving recipe. There was a lot of good and bad feedback:

Slow-cooker Enchiladas

Yes, it looks totally delish! And I would love to try it. But it has everything that bugs me about a “time-saving” slow-cooker recipe — ingredients that must be chopped and pre-cooked twice before the goop is then layered multiple times with tortillas in a slow cooker and left to cook for only 5-7 hours. What part of that is supposed to help with a busy schedule?

I wouldn’t be so bothered if it just advertised itself as a tasty recipe and left it at that. I will make time for increased yum factor on a weekend, some weekends anyway. (And I still take issue with pre-cooking food before I put it in a Crock Pot.) But the cook describes herself as a “busy wife and mother” and says this is a handy recipe. The implied saving of time – that’s kind of where it lost me.

Because in the amount of time it would take me to prepare and cook these enchiladas I could have prepared and cooked an entire Thanksgiving turkey! With stuffing! And cranberry sauce. Not all from scratch, mind you, but it would be yummy food.

The slow-cooker enchilada recipe apparently allows the author to cook dinner after lunchtime and keep it warm until the entire family is home for dinner. I’m sure it works well for people who are home after lunch and can chop, cook, re-cook, layer, and turn on a crock pot for dinner.

But what about people who can’t do that? I don’t think those tortillas will stand up to 10 hours in a slow cooker. I tried that with pasta once. It was delicious-smelling paste!

Once you cook everything as the recipe suggests, I’m worried that the tortillas will get mushy even at 5-7 hours. Maybe refrigerate the cooked goop then spoon it out and reheat in an oven, toaster oven, or microwave when you get home? You could even eat it another day. Reheating it in an oven or toaster oven could even give the tortillas brown, crispy edges and it’s probably less than 20 mins to the table once you get home. Still too much work?

With the slow-cooker in mind, the recipe is basically salvageable with a few busy-mom hacks:

1) Dump raw meat into slow cooker along with seasonings and canned foodstuffs.
2) Cook on low for 8-10 hours.
3) Warm tortillas in toaster oven or a hot pan. Or not. Or use corn chips or crispy tostadas.
4) Spoon goop over tortillas (or chips or tostadas) and top with cheese. ENJOY!

If you sub corn chips for the tortillas, you probably can’t call these enchiladas anymore. So top with some lettuce and tomatoes for a delish taco salad.

If you’re worried about how much fat may be in the dish when you can’t drain the meat ahead, then start with a very low-fat meat. OR skim the fat after everything is cooked. It floats to the top. Cook with free-range, grass-fed beef, and you’ll want to eat a lot of that healthy fat anyway.

I’m going to suggest yet another variation on this, and later I’ll post a simple Slow-Cooker recipe for Misc Mex Meat Goop. Cook it in a slow cooker and eat it how you like — in soft flour tortillas for burritos, over corn chips, in taco shells, or rolled into enchiladas and topped with a quick sauce. Real time-saving food!
Kitchen Nightmares, Level 3, “Hurt Me Plenty”

Last weekend felt like the difficulty setting on life just randomly upped itself a couple of levels. Kind of like when you’re in a treadmill and it gives you a random mountain to scale. Only, okay, nothing too major, so that’s something. But still.

Friday night I dropped half a chocolate peanut butter cream pie in my lap. We ate it anyway. (It was delicious!) The weekend went somewhat downhill from there.

Kitchen projects suddenly reset difficulty levels. “Hurt Me Plenty” level replaced the “Hey, Not Too Rough” level that I would prefer. If not for the lack of respawning monsters it would have felt like “Nightmare!” level at times. (These are difficulty levels for the video game Doom in case you don’t recognize them. Doom! And that’s kind of how it felt.)

We tried to install our new over-the-range microwave oven. This seemed like it would be such an easy task – remove broken microwave, install new, same-size, same-brand microwave, cook dinner! Presto!

Taking the broken microwave down was easy and lulled me into a false sense of confidence and security. I had watched many YouTube videos in preparation for the task. I felt well prepared. I piled a large stack of books on the stovetop to take the brunt of the weight, loosened a few bolts, and lowered the broken microwave to the floor. Easy. I didn’t break a sweat or even a fingernail. And I took a little pride in my accomplishment as a female and in doing it by myself. (I wanted it done and Dave wasn’t up yet. It was early.)

We had imagined the new same-size, same-brand microwave might actually attach to the same mounting plate already affixed to the wall (the metal bracket that holds the major weight of the microwave). But no.

We measured the old and new and nothing matched. Maybe that’s how life changes should be, but we had hoped microwave manufacturers would see things differently. There is both utility and efficiency in hardware consistency.

We had also hoped that, at the very least, the holes needed in the upper cabinet would be in the same place so that we could avoid turning the bottom shelf of the cabinet into Swiss cheese. I could have sworn at least one YouTube video said these holes were standard among over-the-range microwave ovens. But it was another no-go. As if the manufacturer randomly moved each hole several inches in various directions – except for one which is about two millimeters from where it needs to be. So close, yet so far! Pretty sure that was just to tease any annoy us. Ugh.

That’s when more trouble started. And I started to get sick. Not just feel sick, I mean I started sneezing my head off and having no energy. Time for a full-blown cold just when we’ve turned our one remaining construction-free room into a construction zone.

To be continued …

Foggy Morning Drywall

It’s a foggy morning this Wednesday, November 12.

We’re getting drywall! Finally. Work on our unit and entire building started almost a year ago when our balcony door was locked from the outside thus trapping our fresh-cut Christmas tree out on the balcony in a bucket of water. We could see it through a living room window and wondered if that would be it for the holidays.

They began work on the outside of our unit without telling us. We came home one day, and a sign had been taped on the outside of the balcony door window. The door was bolted (wired) shut from the outside. To be fair, technically, the former liaison to the community had posted a note in the lobby on the Friday before. Seeing as we couldn’t use the front parking lot anymore due to construction, we hardly ever walked through the lobby. The notice was in 12pt type and, at a glance, looked exactly like the previous note that had been up for two months. Out of date, it should have been removed. Danny claimed this was our notification. Communications where not his strong suit. We got a new liaison (our fourth) shortly after.

They would demolish the artificial stucco siding outside of our unit thus turning our balcony into a construction zone. We could no longer go out there except by clandestine escape through a window or the one day they let us out to reclaim our Christmas tree and a few clay flower pots left over from summertime greenery. It was cold and some of the clay pots had frozen themselves to the balcony which we freed with tea kettles of hot water. Sweet escape! The workers were helpful and nice as they helped us relocate the tree and pots.

Scaffolding would go up a few months later, then temporary security walls with their pinky, fluffy insulation, clear plastic, and fresh-cut wood smell. And zero windows. No daylight! Just singing workers on the other side along with the sounds of construction. Banging. Saws. Drills. Yelling. It lasted for months.

The pink walls came down in September. I can see this foggy Autumn morning through actual windows. We’ve been in a holding pattern with odd gaps, large sections of exposed 2x4s and fluffy YELLOW insulation peeking out at us. It’s a bit drafty too, so I’m hoping drywall makes that a little better.

One room will be finished soon, then the rest. We hope. Maybe it will be almost normal and free of leaks. It’s a process.

Time-saving “Food”: The Good, the Bad, and the Ugly

What is time-saving “food”? It’s food we might eat to save time that isn’t much like real food in one way or another. This can be both bad and pretty good too.

Busy moms need to feed ourselves and our families. Too often we have so little time that we’re left with few choices and even fewer good choices. A poor diet can make us even more tired than we might already be!

To save time I often “eat” a protein shake that doesn’t even resemble food, but thankfully has better nutrition than a doughnut or bagel. Now if the rest of the family would eat them, everything might be a little easier, but not nearly as pretty or tasty.

Some “food” looks and tastes a lot like real food, but is so sorely lacking in nutrition I have to question its validity as a foodstuff.

My mom worked for much of my childhood. She was a nurse with a schedule that often left her little-to-no time to cook a real meal.

Occasionally we ate fast “food” which was usually fast indeed. Back then fast food never meant salads. The closest things to vegetables were the ketchup, onion, and pickles on our burgers, and I usually picked those off. Today’s fast-food options are only slightly better.

As a kid we feasted on TV dinners and frozen meals. The TV dinners could be kind of fun. They have the word, “TV,” in the name – it must be at least entertaining even if it’s not that good for me, right? And there were plenty of other non-TV frozen meals with such favorites as Stouffer’s Creamed Chicken over toast. Gotta love those spongy cube-shaped pieces of “chicken.” If you closed your eyes you could practically imagine you were eating space food. Once in a while, I even crave that creamy, chicken-flavored goop, but I think Stouffer’s stopped making it. Other standards included tuna casserole, oven-fried chicken, and pot pies. At least a few of those had veggies! But they were highly processed and loaded with salt and fat. Not the healthiest choices.

When Lean Cuisine and Healthy Choice frozen dinners came along, we thought they were a bit of a luxury. Wow, not a zillion calories! See that orange sliver? That’s a carrot. Except I’m always left wondering why there aren’t more veggies. Frozen meals can be puny. They have a serving of protein, sauce, a starch or grain, and a small portion of veg. Doubling or even tripling the veg wouldn’t raise the caloric content by much and it would up both nutrition and satisfaction.

Even when my mom cooked a real meal, the veggies were usually from Green Giant and came in a plastic pouch that she’d “cook” in a pot of boiling water. It was all very ordinary. At least they were better than canned!

As a working mom today, I have a few more options. While there are even more frozen packaged meals, we hardly ever make these for dinner. They’re more often a work lunch than a family dinner. There’s just not that much food in them! We’re left wanting more. (See my sentence above about adding more veg.)

Plain, frozen veggies with no additives are often just as quick and easy as their sauce-covered, poly-bagged, microwavable counterparts, and I can make huge portions. We can eat real food instead of “food”!

For now I’m the one that’s left eating a lot of something that’s, maybe, not technically much like food. I love my meal-replacement protein shakes! I don’t mean I love the taste of them. And I sure don’t like how they look — thick green sludge anyone? But I love how easy they are to make and how packed with nutrition they can be. My favorite brand is Vega One as it’s one of the least yucky. I almost like how they taste. That’s a special kind of ringing endorsement there. But it’s packed with a good quality protein, veg, fiber, antioxidants, omega 3s, and a lot more. They’re super easy – as I use a shaker bottle with ice and water. I actually feel better during the day when I’ve had one for breakfast. When I “eat” them regularly my skin even feels better. It’s a kind of “food” not really food. It’s definitely ugly. But it’s good for me and works well with a busy schedule. Maybe I can even get the family to “eat” one occasionally.

So time-saving “food” can be good. Can be bad. And sometimes it’s what’s for dinner.

November 6, Food for Thought

November 6, oh, November 6. You may be a lame, short post today.

I’m hoping I’ll have a chance to blog a better blog tonight. I have two issues I’d like to cover.

1.) Time-saving “food.”

And

2.) “Time-saving” food.

Yes, those are air quotes. And yes, there is a big difference between the first and second. Really each topic could be a single post, so maybe this will be two additions posts.

In the event I don’t get one of them completed tonight, I figure I can post this-here coming attraction and technically be covered for a November 6 post for NaBloPoMo. Hey, I can try, right?

For the Record: A Snail’s Pace

For the record, in honor of NaBloPoMo, I’m trying to post a blog entry for every day in November. I’ve been struggling to keep up regular posts again, so I aim to fix that.

Some of these may be extremely short posts. And many of them will likely be written on my phone. Today’s will be a good example although it’s longer than I though it would be.

In other news, a couple of weeks ago we got several nerite snails for our two fish tanks. We were having some algae overgrowth, and instead of scrubbing the tanks we decided to try a few algae-eating snails. This is by far one of our better fish tank purchases.

Those snails have been busy! In our ten-gallon tank they have scrubbed the decorative bridge clean. After months of sporting greens, browns, and grays, that bridge is practically day-glo it looks so clean. I think the snails even ate some of the paint off. I hope it doesn’t make them sick. They don’t appear to have slowed down any. So far, so good. One has even moved on to the side of the tank, and there’s now a large clean section.

In our smaller kitchen tank there’s hardly any algae left at all. The striped snail scrubbed the rocks, the back of the tank, the sides … It has now moved on to eating and cleaning algae off the leaves of an artificial plant. It’s amazing!

I would really like a larger, omnivorous, air-breathing snail that I could set free in our living room.

Harbor Breeze by Capital Teas: a mini review

Harbor Breeze by Capital Teas is a refreshing fruity tisane. It contains a good bit of hibiscus so it’s a win if you like hibiscus but not so great if you don’t. It also contains apples, rosehips and other dried fruit, along with lovely calendula petals. The calendula petals are a beautifully sunny contrast to the deep magenta hibiscus, but don’t do much for taste. The apple bits, however, add a softer fruity flavor that mellows the hibiscus giving it better balance than some I’ve tried. It’s tart but not too tart. I find this to be a really satisfying combination when I’m craving a fruity hibiscus tisane.

Tasting Tuesday, er, Sunday: Mead #2 Tasting Notes

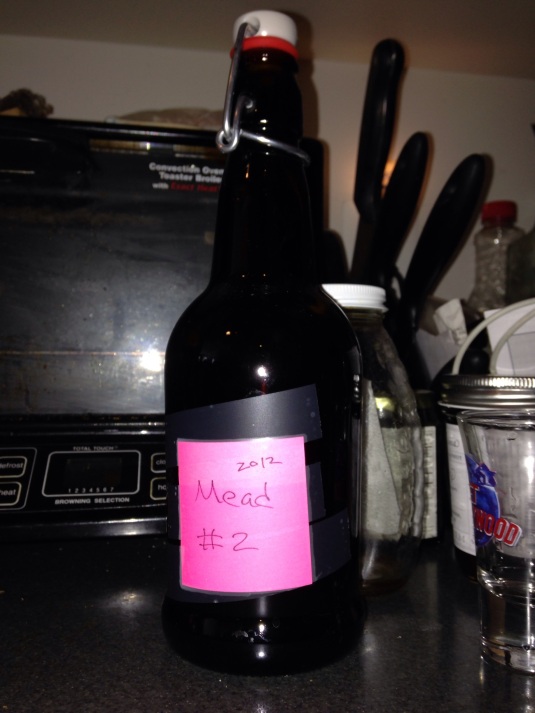
We’ve been drinking some of the mead that I bottled a few weeks ago. Somehow we have very little left of Mead #2. It’s not because it’s necessarily so yummy, but because I said it was OK to drink some of #2. We didn’t make that much in the first place. And we’ve stored the bottles in a place that’s probably too convenient.

I want to keep one bottle unopened for later, but until then we’re accidentally on the second-to-last bottle. So I better do some serious tasting notes on this one for future reference.

I still haven’t yet found my notes on the recipes for each batch, but if I had to go by taste alone I’d say that this is the one that was partly based on Joe’s Ancient Orange Mead. I didn’t follow that recipe exactly because, in general, I hardly ever follow recipes exactly.

I suspect batch #2 is based on Joe’s Ancient Orange Mead (JAOM, JAO, or AO) because I detect a few notes of mild orange and cloves. I remember going really easy on the cloves because I read of others who warned that the cloves can easily overpower the mead if you’re not careful. It’s much easier to add more cloves later if you want. I know that to be true from cloves in lengthy tea steepings.

The aroma is faintly of honey and wine and slightly fruity. There may be just the very faintest hint of a rubbery smell.

The taste is of unsweet mild honey with just a hint of orange and spice. It is slightly tangy and a little bit bitter. Dave describes it as watered down honey with orange peels that have been soaked in water for a week and then some pure alcohol added. I think he partly finds it to be “watered down” because of the overall lack of sweetness.

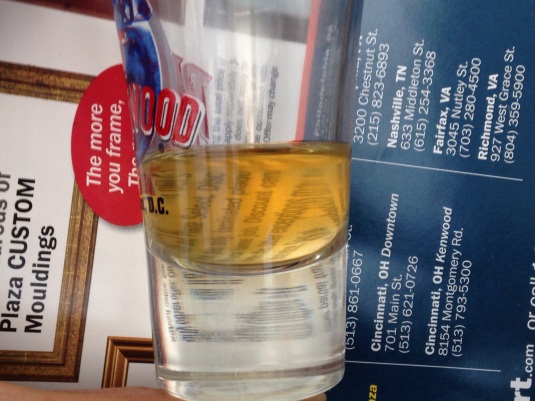
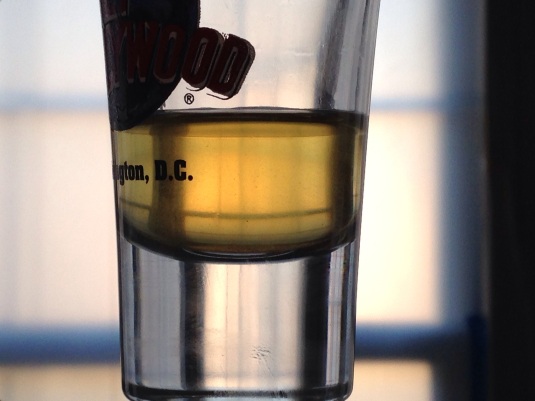
The color is light golden topaz and beautifully clear. I added a bit of buckwheat honey to all of the batches — some more than others — so the color of each is darker than if I’d used a pure orange blossom honey.

I’d say it’s somewhat lacking in body.

Like all our batches to date this one is quite dry. Nearly all sugar has fermented out, so this doesn’t have the traditional sweetness of mead. I’d guess it to be between 14% and 18% alcohol. It’s not so much that you taste it, but it has the mouthfeel of a stronger wine and we can feel it in our toes after drinking a fairly small amount of it. I definitely feel it more than a 12% wine. I notice a bit of a burn after it goes down.

As I wrote above, if I try really hard I can detect a bit of that burnt rubber smell and taste, so I think this is the one that smelled strongly of rubber at one point. I’m not even 100% sure if it’s still there. If I hadn’t been specifically trying to smell it then I probably wouldn’t notice that at all. It is really faint now, and nothing like what it was at about six months old. So this is definitely something to remember about how much mead can change as it ages.

The pH is about 3.2 based on a traditional science kit pH strip. With that strip I have to do a little guessing based on the color since the chart doesn’t have tenths. The pH strips made specifically for the fermentation process read about 3.1 to 3.2. These strips are much easier to read down to a specific pH for home fermentation. It’s good to see the consistency between the two.

I’m attempting to back-sweeten this second-to-last bottle since I don’t have much of anything else to play with for batch #2. Back-sweetening is when you add a sweetener after the fermentation. This adds, well, sweetness. I’ll be adding some wildflower honey.

Different strains of yeasts have differing levels of alcohol tolerance, so it’s one of several things that can make a difference in the dryness or sweetness of your creation. In making wine or mead, the yeast will die off once the alcohol reaches a certain level, so there can be sugar left over. With some yeasts, if you don’t have too much overall sugar (from honey or other) some yeasts just keep eating the sugar until there’s nothing left. Red Star Premier Cuvee may keep going until it reaches 18% alcohol, but that’s fairly high. I used Cuvee in at least one batch and Cote des Blanc (lower tolerance) in another. My notes would tell me which was which. Fermentation stops once it has reached the yeast’s alcohol tolerance level or all the sugar has been converted to alcohol.

If I add honey or other sugars to bottled mead there a risk of restarting the fermentation. Too much of that and the bottles can explode. A little bit and the mead (or wine or cider) can become bubbly or carbonated. It’s a very tricky balance. Bubbles are a good thing with cider, but I have no desire for sparkling mead for now. There are additives you can put in each bottle to prevent fermentation from happening, but I’d like to keep our additives to a minimum.

I blended about two tablespoons of a flavorful wildflower honey to about 440 ml of dry mead. This was more than enough to sweeten it. In fact, I could have done with less. The pH with the added honey reads more of a 3.2 to 3.3. The pH strip is only the slightest hint darker.

This honey gave the mead much more of a traditional sweetness with lots of honey aroma and flavor. I still notice a bit of very mild orange and a hint of spice with a little bitterness. The finish is tangy.

Back sweetening with honey has made the mead a wee cloudy, but that might settle out if we left it for a while or get worse if fermentation starts up again.

There’s a huge difference in the body of the mead. I’d definitely try this again when we want a sweeter mead. This is actually pretty yummy stuff.

I like dry mead more than I thought I would, but I’d also like to try making a sweeter mead that I don’t have to back sweeten.

Overall I think we’re fairly happy with this mead. I’d like to try a similar version again in the future.

IMG_4682.JPG

IMG_4681.JPG

IMG_4684.JPG