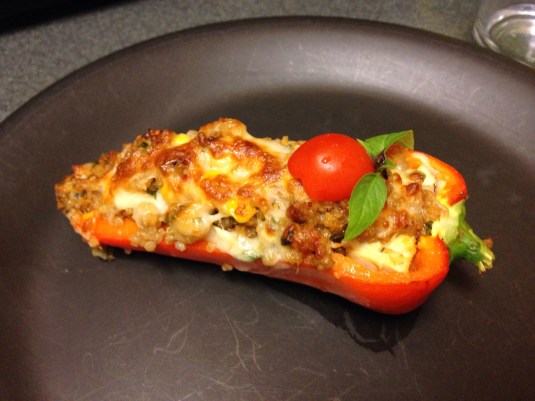
Stuffed Gypsy Peppers.
With quinoa, caramelized onions & garlic, garbanzo beans (chickpeas), corn, diced tomatoes, southwest seasoned grilled chicken, salt & pepper, and the bunch of herbs in the photo from the other day (spicy oregano, flat & curly parsley, Thai basil, and maybe a sprig of mint). Topped with a blend of mozzarella and parm and roasted in our convection toaster oven until the peppers looked a little roasted and the cheese was melty and lightly browned. For the two of us who like spicy, I topped them with sliced semi-ripe jalapeño peppers.*
It turned out really yummy! We all liked it and ate all the leftovers before they could become leftovers.
I have Julia Child to partly thank for the yum factor. We saw her kitchen at the Smithsonian the other day. When we got home I was inspired to stream the movie Julie and Julia. I’d never seen it. It was a cute movie. Julia is amazing. Then I looked up Julia Child on YouTube and watched some of her old PBS show The French Chef. One of the sections was on French Onion Soup.
I’ve never been a huge fan of onions — probably due to the fact that I think I’m partly allergic to them. Too many (cooked or raw) and I feel like I’m coming down with the flu — achy, tired, sore throat, etc. But even when I most disliked onions, earlier in my life, I still kind of liked French Onion Soup and blooming onions too. So as my daughter loves onions (how is she even related to me?) I decided to put onions in our stuffed Gypsy Peppers.
Until watching Julia Child again on YouTube, I have to admit I never properly caramelized onions. Oh, I could brown the heck out of them, but I completely missed the part about actually cooking them before browning them. It makes quite a difference.
I took the “busy mom hack” approach to cooking my onions and zapped them in the microwave until cooked. Then I put them in the frying pan on low heat with some butter and olive oil. They got beautifully caramelized! It added so much flavor to the quinoa and the overall filling for the gypsy peppers.
We had more filling than gypsy peppers, so we just served extra on the plate next to the stuffed pepper — kind of made it look like it was spilling out of the pepper onto the plate. Topped with a sliced cherry tomato and sprig of Thai basil for a garnish. I think it adds a bit of 1970s je ne sais quoi.
They gypsy peppers themselves were to die for! Letting then ripen may have meant fewer total gypsy peppers for our harvest, but the sweetness and flavor were amazing. So sweet! Beautiful color! They are really ideal for stuffing as I didn’t pre-cook them at all. The skin was perfect just filled with our stuffing mix and then cooked in our convection toaster oven.
I only hope that our remaining gypsy peppers get this good. And I hope I can duplicate this again.

*I’ll try to add actual measurements at some point. I didn’t use a recipe. But it was about a can of garbanzos (drained), 2 cups of cooked quinoa, 1/2 a medium-large sweet onion (diced and caramelized), several cloves of garlic, and 1 large diced tomato. Herbs, salt, and pepper to taste. I used all of the herbs seen in the photo here.